Building out a custom form element with the new Episerver forms
Jan 06, 2016
When working with the new Episerver Forms its possible to build out custom forms elements that can be used just like the built in form elements (by simply dragging and dropping them onto the form area). Maris Krivtezs has already written about creating a custom forms field but I wanted to expand this further and create a custom form element with a custom icon, translation etc.
So in this example I’m going show how to create a simple "Restricted text box" element that extends the built in Text element to create a textbox that only allows a certain number of characters in a textbox.
To achieve this we need to create a ConstrainedTextboxElementBlock class to define the model for the element and ConstrainedTextboxElementBlock view to render it on the page.
Form model
The view
This is a simple webforms partial view that by default can be created in the ~/Views/Shared/Blocks folder. This is an extended version of the TextboxElementBlock.ascx that ships with Episerver forms.
Note: Episerver forms ships with a standard set of form views that are installed in the ~/modules/_protected/EPiServer.Forms/Views/Blocks folder. You can add your custom views outside this folder to maintain a clean separation between the shipped views and your custom views. The location of your custom views can be configured in the ~/modules/_protected/EPiServer.Forms/Forms.config file, specifically in the formElementViewsFolder attribute of the <episerverforms> element. By default this value is "~/Views/Shared/Blocks" which is relative to the <project folder> root but you can change this to any folder you wish such as "~/View/Shared/Blocks/Forms".
Translation
We also need to add a translation for the form element name. This uses standard Episerver language XML structure as follows:
This is used when the form element is first placed onto the form and when its shown in the UI:

Form icon
Finally in order to get to the icon we need to register a custom descriptor for our form element:
On rendering this generates a class called "epi-forms-icon epi-forms-{0}__icon" where {0} is the lower case class name of our form element. So we add CSS as follows:
This css can then be loaded as part of the Forms module with the following config change in \modules\_protected\EPiServer.Forms\module.config:
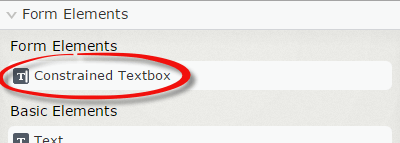
The result
Once built and compiled the new form element will appear in the UI with the custom icon:
Trying it out
The sample code above can be installed into your solution with the ConstrainedTextboxFormElement package available on the Episerver Nuget Feed. The source code is also available on Gist.
Conclusion
It can be seen that the new Episerver forms are easy to extend and easy to use. Have you tried the new Episervers Forms functionality? Is creating custom form elements something you are interested in? I’d be happy to hear feedback in the comments below or on @davidknipe